Digital cameras and smartphones have completely changed how we take and store photos. There’s no limit to the amount of pictures you can take. Here are our tips to efficiently sort, organize and save all your shots.
First of all, bear in mind that you can avoid a lot of headaches by importing your photos correctly. Check which folder each of your devices (tablet, smartphone, DSLR camera, etc.) transfers photos to. Your goal should be to have all your photos stored in the same location. It’s also a good idea to get into the habit of organizing your photos as often as you take them!

1
Delete!
The hardest part is deciding which photos to keep and which to delete. Start by deleting any doubles. We tend to take several pictures of the same subject, so choose the best and toss the rest. Also get rid of any photos that are blurry, overexposed, badly cropped, etc. This way, you’ll free up lots of storage space.
2
Sort your photos
Manually
To quickly find your photos, sort your folders chronologically in the “Images” or “My pictures” folder on your computer. To do this, create a folder for each year and then add additional folders in them for events such as “Birth,” “Christmas,” “Vacation,” etc.
The best way to find a particular shot is to properly identify each photo. Here’s how to rename several photos in a single click: select them (holding down the CTRL key) and right click on the mouse to rename one. This will give them all the same name and automatically number them sequentially. We suggest renaming your photos by date and place: 2016_03_Boston_01.jpg, 2016_03_Boston_02.jpg, and so on.
You should ideally add keywords to your photos to make them easier to find when you search with your operating system’s “Find” feature.
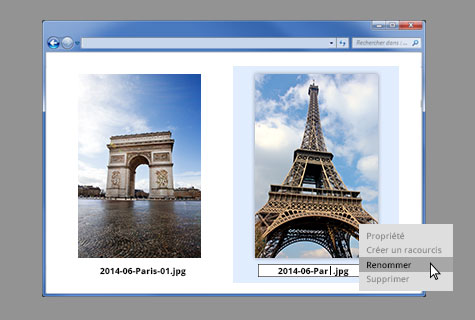
Photo library (Picasa, Aperture, XnView or iPhoto for example)
If you haven’t got the time, patience or desire to manually organize your photos, there’s a lot of photo management software available to do the work for you by automatically arranging your photos, making them easy to find and view. Plus, most can help you to find and eliminate duplicates and thus free up storage space. All that remains to do is create albums and then delete the original folders. Photo library software also has the added advantage of allowing you to easily tag your photos with keywords, which can allow you to find a specific image quickly.
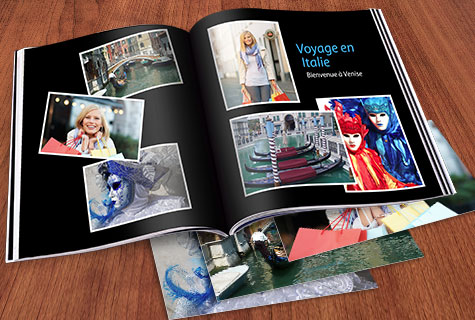
Photo album
This more expensive option is perfect for major events such as marriages, trips, etc. What better than an album to permanently store your snapshots and view them at your leisure?
Boxes
It’s best to store printed photos in boxes to protect them from light. Be sure to label the boxes to make it easier to know what’s in them.
3
Scan printed photographs and negatives
Before scanning every photo you have lying around in boxes, rank them according to interest. Scan the most beautiful at higher resolutions and the others at a lower one, which takes less time and is less space intensive. If you’re using a home scanner, make sure it’s powerful enough to properly scan your photos. Images must be scanned at a minimum size of 1200 x 1560 pixels to be put in a photo album.
For negatives, it’s best to have a professional scan them onto a CD. Remember to never handle the negatives with your bare hands!
4