Delicately clawed
Delicately clawed
Cassandre D.-S.-A., Christian P., Hugo D. & George M.
Change storesavings just for Moi!Enroll in
the program
Cassandre D.-S.-A., Christian P., Hugo D. & George M.
Change storeSign in
Access my Health Record, renew and pay for my prescriptions.
Sign inOffered by your Pharmacist Owners affiliated to Jean Coutu
Shop and enjoy Moi program offers and rewards.
Nail Création is a leader as an authorized distributor of nail products and hand aesthetics. Our products are specially created and designed to meet your highest expectations. Listening to our customers, we are constantly innovating to introduce you to new professional products for nails, always at a fair price. Since 1996, we are proud to be at the service of your beauty!

Prepare the natural nail.
Use a cuticle pusher to outline the contour, an emery file to give it a regular shape and a buffing block to remove the sebum from the surface – this will help with the adhesion of the products.
Practical advice: select the tip from the beginning in order to have it directly at hand during the application.

Perform the nail application.
Apply a coat of brush-on resin at the tip of the nail (not elsewhere!) and press the nail tip over it, without weighing too hard, for about thirty seconds. Give it the desired shape by cutting the majority of nail tip with the nail cutter, then working the details with a nail clipper or a gold file, rough and extensively resistant.
Practical advice: to prevent imperfections, remove residual dust with a manicure duster.

Work the nail tips for optimum hardness and strength.
Cover the entire surface with brush-on resin and apply clear or pink powder. After dusting the excess, cover the powder with brush-on glue: it will become translucent. Give a final layer of brush-on resin, then spray a drying activator to seal it all.
Practical advice: for better results, hold the activator bottle 5 cm from the nail and give it two sprays.

Ensure the finish.
Even up and matte the surface of the nail with the buffing block. Then use a curved "banana" file or a manicure drill to correct some details and adjust the cuticle’s outline. At the very end, oil the cuticle, to nourish it and favor healing, if any.
Practical advice: for a shiny effect, add a coat of crystal base, then two layers of crystal finish on the nail before applying the cuticle oil. Don’t forget to wipe the brush of the crystal finish after use; otherwise, traces of other products will contaminate the bottle.
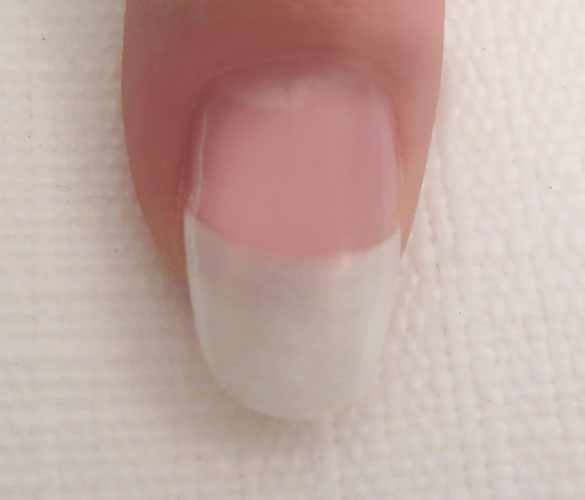
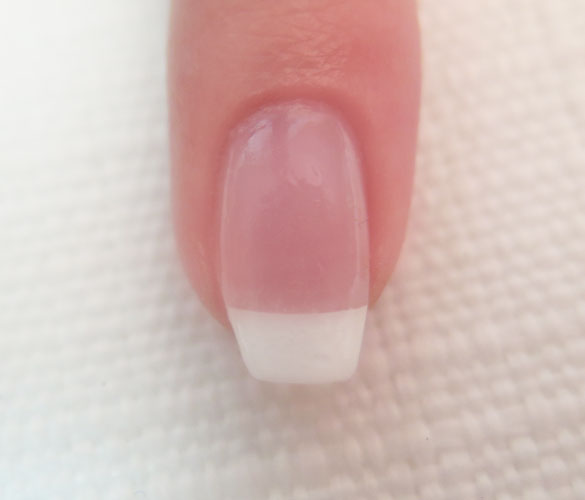
The pearl tip gives the nails a subtle elegance and a professional look. It is part of a classic look illustrating all the steps of a basic nail application, from preparation to finish.
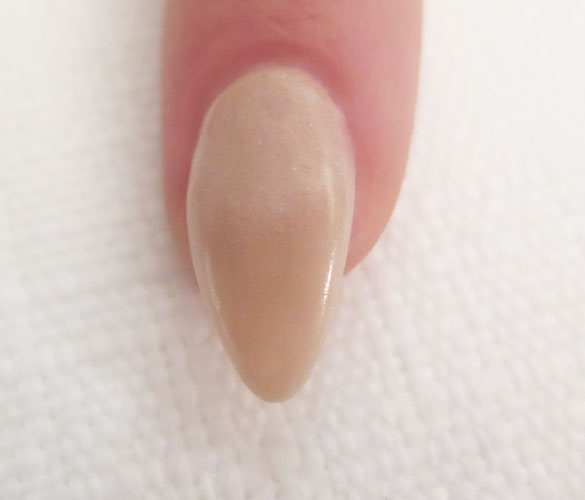
The Natural tip, which is reminiscent of the appearance of nails, is the perfect support for styles that incorporate color and brilliance. It gives body and opacity to the shades used…as evidenced by this look! To achieve this, simply follow the steps of the basic application by cutting the tip in almond shape and applying the color powder after the clear powder.
This look without tips is perfect for anyone who wants to show natural nails. After preparing the nail and giving it the desired shape (flat at the top and rounded on the sides, like a ballet shoe), place a white manicure guide on the tip and cut it with triangular and sharp scissors. Work the nails as in a basic nail application and give them radiance with the crystal base and crystal finish.
Style tips: For a more assertive look, nothing stops you from adding colorful of shiny powder!
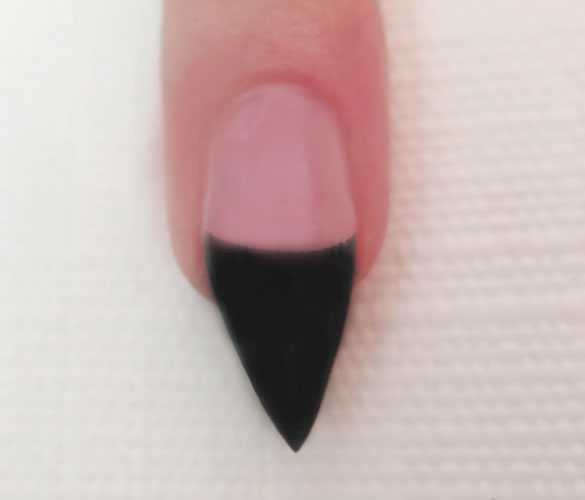
Perfectly transparent, the crystal tip leaves room for creativity! It offers the ideal ground for playing with textures or colors. The proof? This look, which is obtained by giving a sharp shape, or « stiletto », to the nail tip, and soaking the end in a black powder container at the time of coloring.

For this look without tips, apply protective liquid around the nail. When drying, the liquid will form a sort of shield that will prevent the products from escaping and protect the cuticle from aggressions.
Give a coat of black gel nail polish, a coat of transparent base and a coat of mirror powder with transparent base. After each coat, let the nail stand under a UV lamp for 40 seconds to cure the product.
Once these operations are complete, remove the protective liquid with a cuticle pusher, pass an alcohol swab on the nail, and drop a few drops of nourishing oil around.
Crystal finish
It is essential to wipe the brush from the crystal finish on a clean paper towel each time before putting the brush back into the bottle, this will allow you keep your product longer and prevent the brush from hardening.
Preserving artificial nails
It is important to melt your artificial nails in acetone 100% pure after 3 weeks to maintain healthy natural nails.
Nail application duration
Allow between 1 and 2 hours for a first nail application (it is better to melt your artificial nails the day before for a faster nail application). We suggest starting with the hand in which you are the least skillful.
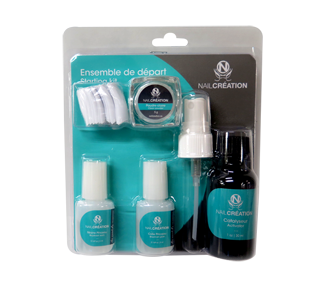
No need to get your nails done at a salon, our starting kit will provide you with all that you need in order to create professional looking nails. With our starting kit, you will be able to do your nails 3 to 4 times.
Did you know that we offer a great selection of Nail Création products in our online store? Check it out and let yourself be tempted!
You may change the store at any time.