A starry sky, sunset, construction site or blooming flower: watch the world evolve at an accelerated pace thanks to the time-lapse method. Follow the required steps and always end up with a successful sequence.
What is time-lapse?
Time-lapse is a technique that consists in creating an accelerated video using a series of photos taken in the same location at different times. This notably allows you to showcase the passing of time in one place during an entire day, from sunrise to sunset. It can also feature car or foot traffic, the evolution of a construction site over many days or the blooming of a flower.

How to do it
To make it happen, you’ll need to take photos at regular intervals and then view them at film speed—25 frames a second—to get fluid results. This involves taking a lot of photos. Indeed, if you added them all up, you’d need a total 250 photos for a 10-second video.
Equipment
A tripod
The time-lapse method uses the same shot at different moments. You therefore have to affix your camera to a tripod to ensure that it doesn’t move throughout the entire session. It’s an essential tool.
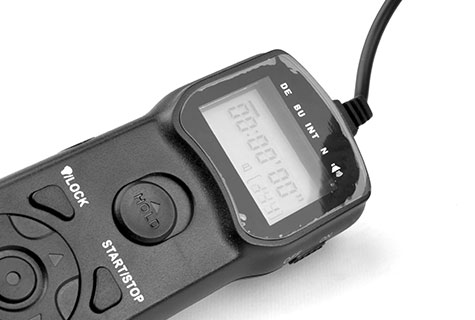
An intervalometer
You can obviously take the photos manually, but if you have to shoot over a thousand at 5-second intervals, you’ll certainly prefer an automated solution. That’s what an intervalometer provides. It’s a tool that you can attach to your SLR camera and it does the work for you once you’ve set it to the desired interval. Some cameras have integrated intervalometers, and there are specialized applications for cellphones and tablets. Finally, you can also use software when your camera is linked to your computer.
Memory cards and batteries
Depending on the type of time-lapse you want, the shot length may vary from a few hours, to a full day, or even multiple days. If you’re working outdoors, bring high-capacity memory cards and extra batteries.
Settings
The shot
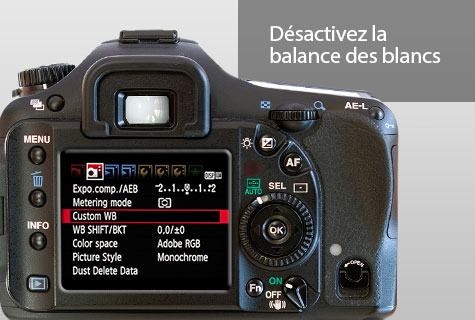
Avoid automatic settings. Depending on the time of day and weather, you could get exposure gaps that are too wide. To avoid this, turn off the automatic white balance. You also need to deactivate the autofocus, which could create focus issues. Finally, check your chosen framing with a test photo, which will serve as your visual reference for the entire sequence.
Interval
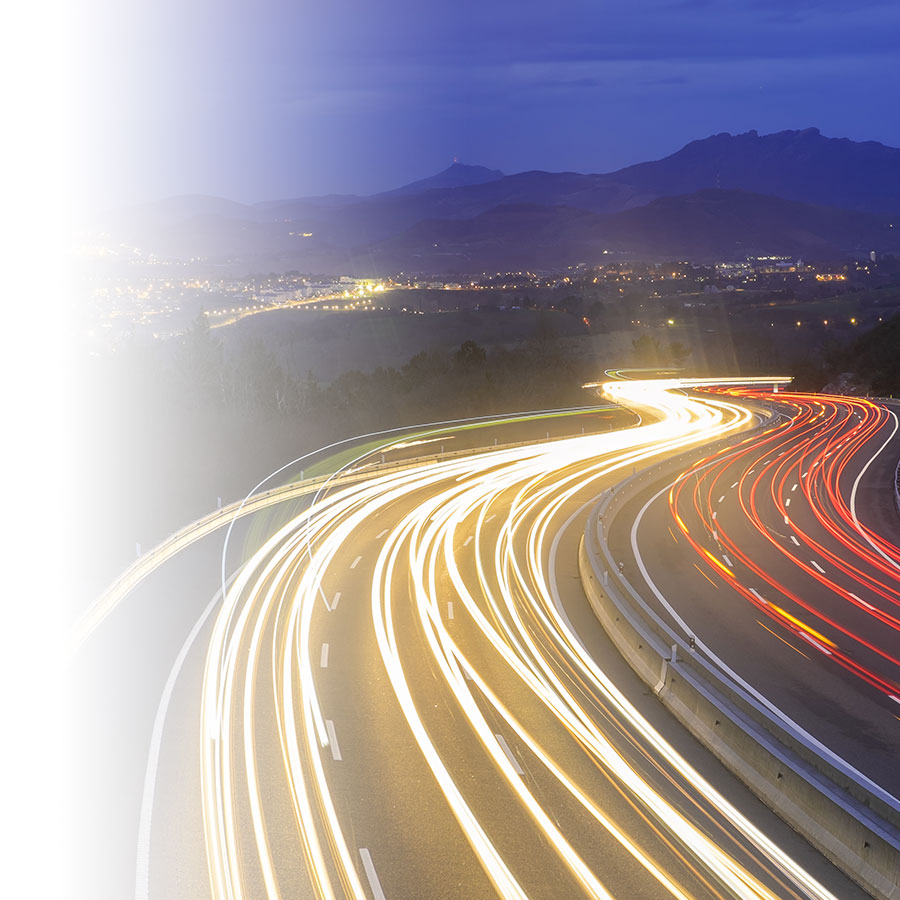
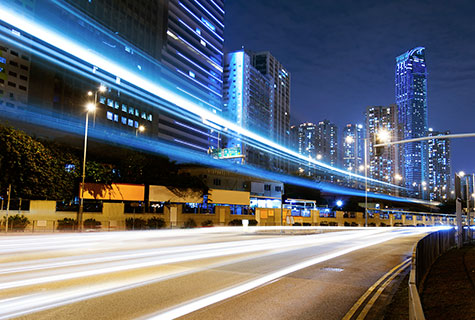
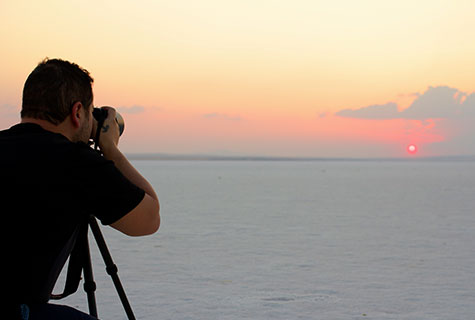
It’s important to choose the proper interval between shots. This will have an effect on the video’s fluidness and provide the desired effect. To watch city traffic or pedestrian motion, select a very short interval: 1 second; for clouds: 3 to 5 seconds; sunrise and sunset: 5 to 10 seconds; a starry sky: 30 seconds to 1 minute; a construction site every hour or every day, depending on the circumstances and observed activity.

Editing
The last step in creating a time-lapse sequence is editing. There’s a lot of photo and video editing software out there. Picasa, Lightroom Timelapse, Time Lapse Assembler and VirtualDub are the most well known. Some are more complex than others, but they also provide more options. For cellphones, the Time-Lapse, Lapse It, Time Lapse Camera HD and iTimeLapse Pro apps are very comprehensive and easy to use.