It’s much harder to take good photos in low light. However, by considering the environment, your subject and your camera’s various settings, you can get excellent results. Follow all our tips and tricks.
Make photo lighting
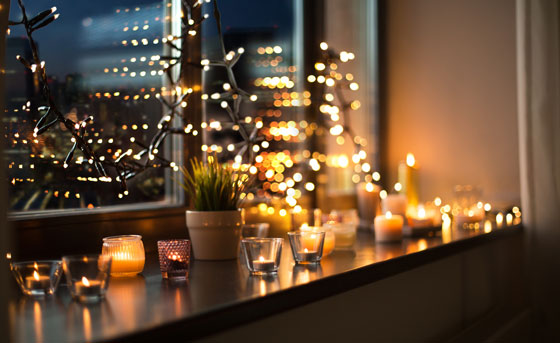
The first thing you should do in a dark setting is look for any available light source: lamps, candles, windows, etc. Depending on the effect you want, bring the subject as close as possible to a light source or vice versa. You can also add artificial light by using a flash. However, be careful: your camera’s automatic flash usually produces a disappointing effect with overly strong frontal lighting that flattens the subject. The foreground becomes too bright, almost burnt. As for the background, it comes out way too dark and blends into the shadowy areas. For better results, use an adjustable, external flash equipped with a diffuser.
Stabilize your camera
The main problem you’ll encounter in a low-light setting is that any movement can blur your image. That’s because the shutter speed is too slow in this lighting, especially if you’re using a device with a low-definition sensor like a cellphone. In that case, you absolutely have to stabilize your camera, and the best way to do so is with a tripod.
Mastering the settings
- Aperture
If you’re using a DSLR camera with manual settings, you’ll be able to play with your device’s three technical elements. If there’s not enough light, you can choose a larger aperture. Remember: the smaller the number, the wider the aperture. Use a lens with a large aperture (f/2.8 minimum). On the other hand, favouring aperture will diminish the depth of field, making the background blurrier. - Shutter speed
The second setting you can change on your camera is shutter speed. By making it slower, you’ll be letting in more light. Be careful, though: If the speed is too slow, the image will be blurry. For this reason, you absolutely need to stabilize your camera. Also, if your subject is moving —during a show or concert, say — you’ll end up with an unattractive blur if you’re not in control. - ISO sensitivity
You should usually change this setting as a last resort because, the higher you make the ISO, the more noise it will add to the image, which degrades your photo. You generally don’t want to go higher than 400, max 800 ISO. More recent DSLRs can provide more reasonable noise with a higher ISO sensitivity. Test it out.
Post-treatment adjustments
You can make adjustments during post-treatment if there’s not enough light when you take the photo. A small tip: don’t hesitate to under-expose your pictures to get a higher shutter speed and greater clarity. Post-treatment, on software like Lightroom or Photoshop, allows you to correct exposure and bring out lost details. If you’re using a DSLR, shoot in RAW format. It’s heavier, but it will allow you to access all information recorded by the lens when you took the shot.