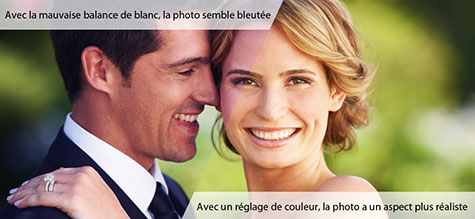
The colour of your light source is not always white—and if you’re not careful, you may end up shooting your subjects in an unflattering light. This is why you need to set the white balance; it will calibrate the colours in your photos, and ensure that they are accurately reproduced.
Do your photos look too yellow? Is the light too cold or too warm? If your camera didn’t render the colours accurately, it’s probably because you didn’t set the white balance properly. This function will allow you to get more natural and realistic shots instead of shots with an unsightly blue, green or red colour cast.
The colour of your light source is not always white. Thankfully, your camera is able to automatically detect the colour of your light source and adjust the white balance. However, your camera can quite often get it wrong! Thus, it’s better to manually adjust your camera’s white balance. Doing so will greatly improve picture quality.
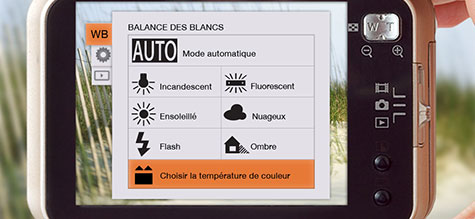
Automatic white balance
Start by disabling the auto white balance setting (AWB). If you can’t find it, go to the menu that provides you with the following presets: "daylight", "tungsten", "cloudy", "incandescent"... Choose the lighting option that most closely matches the lighting in your current location.
A reference guide to settings
Here are some of the most used settings:
- When outdoors in bright daylight: opt for the "auto white balance" (AWB) setting.
- When indoors with different light sources: opt for the "tungsten" setting.
- When outdoors and it’s overcast: opt for the "cloudy" setting.
There are other, more fine-tuned settings, like "candlelight" for when you’re in a low-light setting, or even "fluorescent" which allows your camera to adapt to harsh fluorescent lighting. Test out the settings in order to find the one that will give your photos a unique look.
Don’t despair
Ambient lighting can change suddenly—such as when a cloud rolls in, or someone turns on a harsh light... and then you have to adjust the white balance all over again! Other environments may be a total headache to work with, for example when you have to deal with several light sources within one picture. For best results, correct the white balance using image editing software. With this in mind, you’re better off selecting the RAW mode on your camera so as not to compromise the picture quality as you shoot.
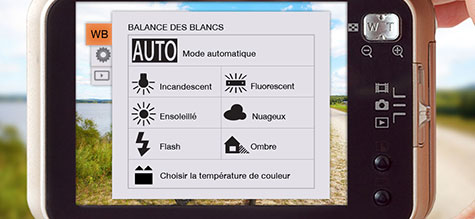
How to manually adjust the white balance
Your pictures show up as yellow, and no matter what preset you choose, it still doesn’t help? Just adjust the white balance yourself! Take a white sheet of paper or object, then photograph it - it will serve as your reference point. Then go to the menu to customize the white balance setting (usually the icon shows a square mounted on two triangles) and follow the instructions. You’ll end up with a white balance that’s perfectly in tune with your location’s lighting, and sharper colours.