Your task seems complete—the photos have been taken, they’re ready to be developed, and the frame has been picked out. But what if that were just the beginning? Embark on a crafty adventure with easy and original DIY ways to showcase your best photos.
Prepare your photo files
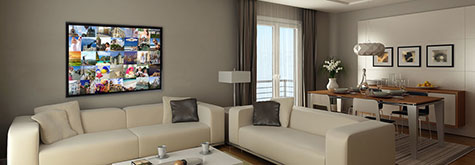
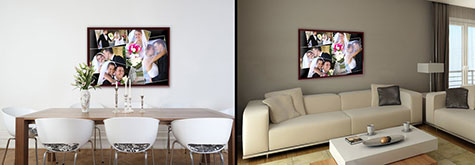
Start by deciding what you’re going to display your picture in and where you’re going to put it. Are you thinking of a frame to decorate the living room, or a small picture holder for the entrance hall? Where necessary, ensure that the resolution of your files is the right one for your projects. Enlarging a photo to an 8 x 10 size will require a 5-megapixel (MP) file. As a comparison, a photo blown up to poster size requires 10 MP. If you can’t decide on one picture, you can print several on the same poster. Furthermore, PJC’s software allows you to make collages, i.e. to randomly piece several photos together on a background of your choice—you can even add your own captions!
Recycle
Put the famous quote “Waste not, want not” into practice. To find original ideas, there’s nothing like a trip to an antique store, or a stroll along the sidewalks of your city!
- Once it has been repainted, an old wooden shutter can become a picture holder. You can slide a lot of photos in between the slats!
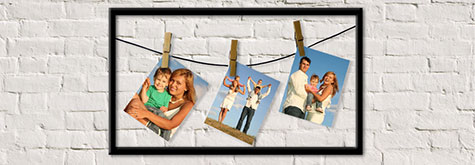
- You can breathe new life into a glass-less frame by stretching a few pieces of string across the inside of the frame. All you need to do is hang your photos on the string using mini clothespins.
- Clean out a Mason jar, fill it with oil before plunging your photo into it. For a vintage effect, opt for a black and white picture. Add a sprig of lavender to hold the picture up, close the jar and decorate it with a piece of ribbon. You just made a photo jar!
Focus on eye-catching details
Often, just one small detail can make your photos that much more special and personal. Especially when it comes time to hang them up. Fabric, wood, stone . . . Don’t hesitate to play with materials.
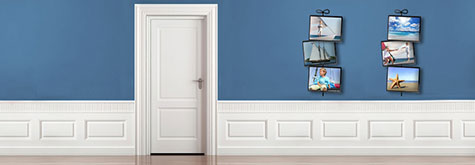
- You can hang three photos vertically on a wide piece of ribbon. Also, you can draw inspiration from your beach photos and hang three little frames with three thick pieces of rope of varying lengths. By attaching the rope to the same hook, using a sailor’s knot if possible, your three frames will hang at different heights for a lovely jumbled up look.
Go big
Don’t be scared of going overboard. If you can’t stick to one picture, why not opt for hundreds of photos? Reformat them into squares and arrange them in a huge frame. The result will be very graphic, without being too imposing. For an equally spectacular effect, get a clock with a big minute hand. Many decorating stores sell them in a variety of colours. Pick out 12 portrait photos and put them in small frames. Attach them the whole way around the clock to represent the hours. Now as the minutes pass, you can also be reminded of your best memories—a beautiful way to freeze time!